The Short Answer
- DIY pre-grading saves $25-$150 per card by identifying which cards are worth submitting before you pay PSA, BGS, or CGC fees.
- The four-pillar inspection method — centering, corners, edges, surface — mirrors exactly what professional graders evaluate.
- Centering is the #1 grade killer and the easiest to measure at home with AI tools achieving 99.2% measurement accuracy.
- Photo quality is the single biggest factor in AI pre-grading accuracy — use even lighting, neutral backgrounds, and high resolution.
- A 10x jeweler's loupe costs $8-$15 and reveals corner whitening and edge chipping invisible to the naked eye.
- The 10-second workflow — photograph, AI analyze, sort — lets you process a 100-card shoebox in under 30 minutes.
- Only 8.88% of PSA submissions earn Gem Mint 10 — pre-grading helps you identify that elite subset before paying.
Why DIY Card Grading Matters in 2026
The card grading landscape has changed dramatically. In 2026, professional grading is more expensive and slower than ever. PSA Regular costs $79.99 per card with a multi-month backlog of 11.85 million cards. BGS has paused its Base and Standard tiers entirely. CGC Economy at $17 per card has a 150-working-day turnaround. Submitting blindly — hoping your card gets a 10 — is no longer a viable strategy.
DIY card grading is the solution. By evaluating your cards' condition at home before submitting, you can filter out the cards that would come back at PSA 7 or 8, saving hundreds or thousands of dollars in wasted fees. The hobby has quietly split into two camps: traditional hobbyists who rely on gut instinct, and precision collectors who treat grading as a data problem. The latter group uses technology — AI-powered apps, centering calculators, and magnification tools — to pre-screen cards before a single dollar leaves their wallet.
The economics are compelling. A collector with 50 cards to evaluate faces $1,250-$3,750 in PSA submission fees. Pre-screening those same 50 cards at home costs $5-$50 in AI tool credits and 30 minutes of time. The typical result: 15-20 cards identified as PSA 9+ candidates worth submitting, and 30-35 cards identified as better sold raw. That is $750-$2,800 in saved grading fees.
This guide covers everything you need to pre-grade cards at home: the tools, the photo setup, the four-pillar inspection method, AI tool integration, and the decision framework for which cards to submit.
Tools You Need: The DIY Grading Kit
You do not need a laboratory to pre-grade cards at home. Here is the complete kit, organized from essential to optional:
Essential Tools
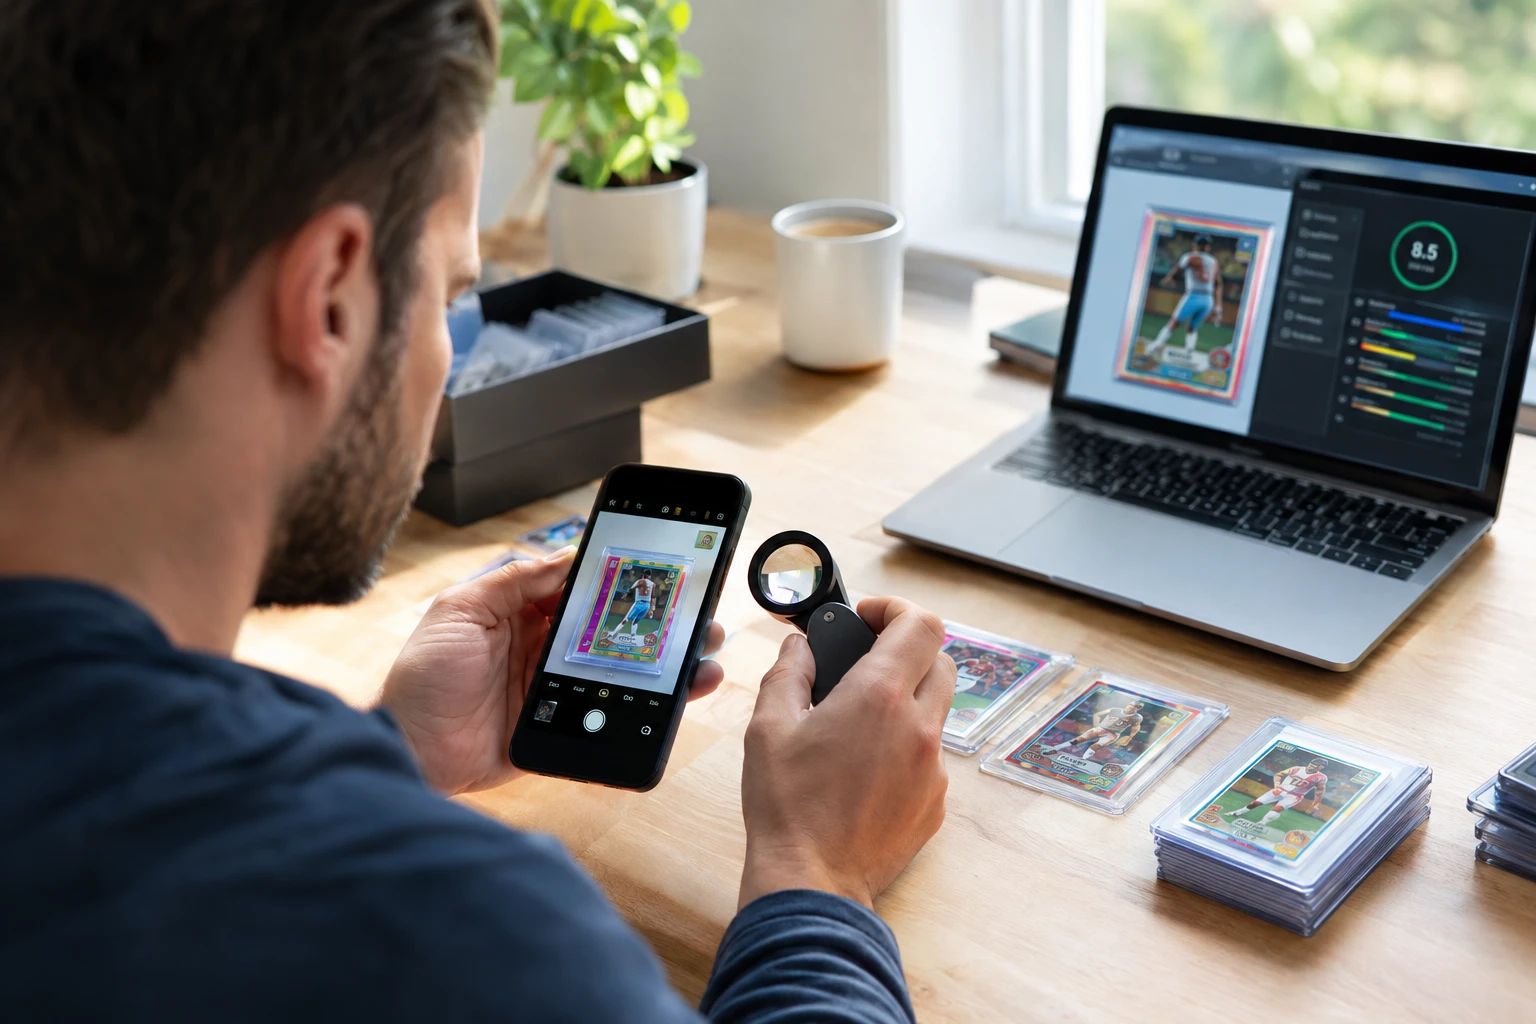
- Smartphone with a decent camera: Any phone from the last 4 years works. 12MP+ recommended. You are taking photos for AI analysis, not artistic shots.
- Even lighting source: A daylight-balanced LED panel ($15-$30) or natural window light. Avoid flash — it creates glare that hides surface defects.
- Neutral background: A black or white flat surface. A cutting mat or piece of poster board works. Avoid textured surfaces that confuse AI edge detection.
- AI pre-grading tool: PreGradeCards Complete Grading (50 free credits) or any tool from our comparison guide.
Recommended Tools
- 10x jeweler's loupe ($8-$15): Reveals corner whitening, edge chipping, and surface micro-defects invisible to the naked eye. PSA graders use loupes — you should too.
- Phone stand or copy stand ($10-$25): Keeps the camera at a consistent angle and distance. Eliminates motion blur and ensures repeatable results.
- UV light / blacklight ($10-$20): Reveals print defects, scratches, and surface issues invisible under normal light. The #1 tool for pre-screening surface condition.
- Ruler or digital caliper ($5-$15): For manual centering measurement if you want to verify AI results.
Optional Advanced Tools
- Polarized light filter: Reduces glare on holographic and reflective card surfaces.
- LiDAR-enabled phone (iPhone Pro, iPad Pro): Guardian TCG has demonstrated LiDAR-based surface analysis that maps card topography with depth-sensing precision.
- Scanner (flatbed or document scanner): Provides the most consistent lighting and resolution for AI analysis. Not necessary but produces the best results.
Photo Setup: How to Photograph Cards for AI Analysis
Photo quality is the single biggest factor in AI pre-grading accuracy. A perfectly centered PSA 10 card photographed under bad lighting will get an inaccurate AI prediction. Here is how to photograph cards for optimal AI analysis:
Lighting
- Use daylight-balanced LED light (5000K-6500K color temperature).
- Position the light at a 45-degree angle to the card to minimize glare.
- For holographic cards, use two lights at 45 degrees from each side to cancel out reflections.
- Avoid fluorescent lighting — it creates flicker that can affect color accuracy.
- Never use flash. Flash creates a hotspot that hides surface defects.
Positioning
- Place the card flat on a neutral background (black or white).
- Position the camera directly above the card, perpendicular to the surface.
- Fill the frame with the card, leaving a small margin around the edges.
- Keep the camera steady — use a stand or rest your elbows on the table.
Resolution
Higher resolution means better AI analysis. Aim for at least 2000x2800 pixels (approximately 6MP). Most modern phone cameras exceed this easily. If your phone has a "Pro" or "High Efficiency" mode, use it. Avoid digital zoom — it degrades quality. If you need to get closer, move the camera physically closer.
Front and Back
Always photograph both the front and back of the card. Back-corner and back-edge whitening is the classic grade-killer on Pokémon cards, and it is invisible in a front-only photo. Any AI tool that grades from a single front photo is structurally blind to the defect professional graders punish hardest. PreGradeCards weights front analysis at 70% and back at 30%, matching how professional graders evaluate cards.
Step 1: Measure Centering
Centering is the first pillar to check because it is the most common grade-killer and the easiest to measure. Centering measures how evenly the printed image sits within the card's borders, expressed as a ratio: 55/45 means one border takes 55% of the total border width and the opposite takes 45%.
PSA Centering Standards
- PSA 10: 60/40 or better on front, 75/25 or better on back
- PSA 9: 70/30 or better on front, 90/10 or better on back
- PSA 8: 75/25 or better on front
- PSA 7: 80/20 or better on front
How to Measure
The fastest and most accurate way to measure centering is with the PreGradeCards Centering Analysis tool. Upload a photo and the AI measures exact left/right and top/bottom ratios with a visual overlay in seconds. Centering measurement accuracy is 99.2% — more precise than what most collectors can achieve with a ruler.
To measure manually: use a ruler to measure the width of each border (left, right, top, bottom). Calculate the ratio: left border / (left + right) × 100 = left percentage. If left is 55% and right is 45%, the centering is 55/45. Repeat for top/bottom.
Why check centering first? Because it is permanent — you cannot fix it. It was baked in at the factory. A card with 62/38 centering that you grade and slab will come back PSA 9, not PSA 10, and the value gap between PSA 9 and PSA 10 can be 3x to 10x on modern rookie cards. If centering eliminates a card from PSA 10 contention, you need to know that before spending $79.99.
Step 2: Inspect Corners
Corners are inspected at 10x magnification by professional graders. They look for whitening, fraying, softening, or dinging. Even one damaged corner can drop a card from PSA 10 to PSA 8. Modern cards with dark borders show corner wear more visibly, but light-bordered cards hide the same damage from the naked eye — not from the grader.
DIY Corner Inspection
- Visual inspection: Examine each corner under good lighting. Look for whitening on dark-bordered cards, fuzziness on light-bordered cards.
- Loupe inspection: Use a 10x jeweler's loupe to examine each corner closely. Look for fraying (fibers sticking out), softening (rounded instead of sharp), and dinging (bent or compressed).
- AI analysis: Upload to PreGradeCards Complete Grading — the AI evaluates all four corners individually and flags any with whitening or wear. Corner accuracy is 93% within ±0.5 subgrade.
- Back corners: Do not forget the back! Back-corner whitening is the #1 grade-killer on Pokémon cards. Always check back corners with your loupe.
Corner Red Flags
- Any whitening visible to the naked eye → likely PSA 8 or below
- Whitening on 2+ corners visible under loupe → likely PSA 8
- Fraying on any corner → likely PSA 7 or below
- One soft corner (rounded tip) → caps at PSA 9
- All four corners sharp with no whitening under loupe → PSA 10 candidate
Step 3: Check Edges
Edges are the third pillar. Graders look for perimeter wear, chipping, silvering, whitening, and rough cuts around the card border. Edge wear is most visible on dark-bordered cards (Pokémon, MTG) where white chipping stands out against the black border.
DIY Edge Inspection
- Visual scan: Hold the card at eye level and look along each edge. Tilt the card slightly to catch light reflecting off the edge surface.
- Loupe inspection: Run your 10x loupe along each edge. Look for chipping (small nicks), silvering (silver-colored wear on foil edges), and rough cuts (jagged or fibrous edges from manufacturing).
- AI analysis: The AI checks all four edges and reports wear levels. Edge accuracy is 87.6% within ±0.5 subgrade.
Edge Red Flags
- Visible chipping on dark borders → likely PSA 8 or below
- Silvering on foil edges → likely PSA 9 cap
- Rough cut edges (manufacturing) → may cap at PSA 9 even if otherwise perfect
- Clean, smooth edges with no visible wear under loupe → PSA 10 candidate
Note: Edge wear from manufacturing (rough cuts) is not the same as edge wear from handling. PSA graders evaluate both, but manufacturing roughness is common on modern cards and typically caps at PSA 9 rather than dropping to PSA 8.
Step 4: Analyze Surface
Surface is the hardest pillar to evaluate at home and the hardest for AI to assess from photos. Graders look for print lines, scratches, dents, stains, indentations, and gloss disruptions on both the front and back.
DIY Surface Inspection
- Raking light test: Hold the card at an angle under a single light source. The light should rake across the surface at a low angle. This reveals indentations, dents, and pressure marks that are invisible under direct lighting.
- UV light test: Shine a UV/blacklight on the card. Print defects, scratches, and surface issues become visible under UV light. This is the #1 tool for pre-screening surface condition.
- Gloss check: Tilt the card under light to check for gloss disruptions. A matte spot where the rest is glossy indicates a surface defect.
- AI analysis: The AI detects visible surface flaws with 76% sensitivity. This improves to 91% with dual-angle scan input. Surface is the one pillar where manual inspection still outperforms AI.
Surface Red Flags
- Print lines (visible under raking light) → likely PSA 8 or below
- Scratches visible under UV → likely PSA 8 or below
- Dents or indentations → likely PSA 7 or below
- Stains or discoloration → likely PSA 6 or below
- Clean surface under raking light and UV → PSA 10 candidate
For holographic cards, surface inspection is especially important. Holo patterns can hide scratches and print defects. Use raking light at multiple angles to check the holo surface thoroughly.
Integrating AI Tools into Your Workflow
The DIY grading workflow becomes powerful when you integrate AI tools. Here is the recommended workflow that combines manual inspection with AI analysis:
The Hybrid Workflow
- Photograph the front and back of the card under proper lighting.
- Manual centering check: Visually assess centering. If it looks badly off, use the Centering Analysis tool to get exact ratios.
- Manual corner check: Examine all four corners with a 10x loupe. Note any whitening or fraying.
- AI analysis: Upload front and back photos to PreGradeCards Complete Grading. The AI returns sub-grades for all four pillars, a predicted PSA/BGS/CGC grade, and a confidence score.
- Compare: Compare your manual findings with the AI results. If they agree, you have high confidence. If they disagree, investigate further — the AI may have caught something you missed, or you may have caught something the AI missed (especially surface defects).
- Surface check: Do the raking light and UV tests. The AI's surface analysis is its weakest pillar (76% sensitivity), so manual surface inspection is critical.
- Decision: Based on the combined AI + manual assessment, sort the card into Grade, Sell Raw, or Hold.
This hybrid approach leverages the strengths of both methods: AI's 99.2% centering accuracy and 93% corner accuracy, combined with human surface inspection under raking light and UV.
The Batch Workflow: 100 Cards in 30 Minutes
For collectors with a shoebox full of cards, individual analysis is too slow. Here is the batch workflow that processes 100 cards in about 30 minutes:
Step 1: Set Up Your Photo Station (5 minutes)
Set up your lighting, background, and phone stand once. You will photograph all 100 cards from the same position, ensuring consistent results.
Step 2: Photograph All Cards (10 minutes)
Photograph the front and back of each card. With a phone stand, this takes about 6 seconds per card — place, photograph, flip, photograph, next. 100 cards × 2 photos × 6 seconds = 20 minutes. With practice, you can get this down to 4 seconds per photo.
Step 3: Batch AI Analysis (5 minutes)
Use the PreGradeCards Batch Grading tool to upload up to 20 cards at once. The AI processes them in parallel, returning per-card sub-grades and predicted grades. Five batches of 20 cards = 5 uploads. Total AI processing time: about 5 minutes.
Step 4: Sort by Predicted Grade (5 minutes)
Review the AI results and sort your cards into three piles:
- Submit pile: Cards predicted PSA 9+ with high confidence. These go to professional grading.
- Sell raw pile: Cards predicted PSA 7-8. Sell these raw with an AI condition report to justify your asking price.
- Hold pile: Cards predicted PSA 6 or below. Not worth grading or selling individually — hold or bundle.
Step 5: Manual Verification (5 minutes)
For the submit pile, do a quick manual verification — loupe the corners, raking light the surface. This catches the 11% of PSA 10 false positives. If the manual check confirms the AI prediction, submit with confidence.
The Submission Decision Tree
After pre-grading, you face the submission decision. Here is the decision tree:
If AI predicts PSA 9.5-10 with 85%+ confidence:
Submit. This is a strong candidate. The expected value of a PSA 10 submission is almost always positive for cards worth $50+. Use PSA Regular ($79.99) for cards worth $200+ and CGC Economy ($17) for lower-value cards where the grading cost ratio is more favorable.
If AI predicts PSA 9 with 80%+ confidence:
Submit if the math works. Calculate: (PSA 9 value × probability of PSA 9) + (PSA 10 value × probability of PSA 10) - grading cost - shipping. If the expected value is positive, submit. For modern rookie cards where PSA 9 vs PSA 10 is a 3x difference, this is usually worth it.
If AI predicts PSA 8 or below:
Sell raw. The grading cost ($17-$80) plus shipping and insurance will rarely be recovered by the slab premium on a PSA 8 card. List the card raw with the AI pre-grade report to build buyer trust and justify your price.
If AI predicts PSA 7 or below:
Hold or bundle. These cards are not worth grading or selling individually. Keep them in your collection, bundle them in lot sales, or trade them.
If the card is vintage (pre-1980):
Use extra caution. AI accuracy drops to 71-79% on vintage cards. Combine the AI prediction with thorough manual inspection, population report analysis, and recent sold comparables before deciding. Vintage cards have different economics — even PSA 5-7 can be valuable for rare cards.
Common DIY Grading Mistakes
Even with the right tools and workflow, collectors make predictable mistakes that lead to bad submission decisions. Here are the most common ones:
1. Trusting the Naked Eye on Corners
The naked eye misses 40% of corner defects that a 10x loupe catches. PSA graders use loupes. If you are not using one, you are grading at a disadvantage. Spend $10 on a jeweler's loupe — it pays for itself with one avoided bad submission.
2. Ignoring Back Corners and Edges
On Pokémon cards, back-corner whitening is the #1 grade-killer. It is invisible from the front. If you only inspect the front, you will submit cards that look perfect from the front but have back-corner damage that caps them at PSA 8.
3. Bad Photos for AI Analysis
AI accuracy depends on photo quality. A card photographed under dim, uneven lighting with a shaky hand will get an inaccurate prediction. Invest 5 minutes in setting up a proper photo station — it makes every AI prediction more reliable.
4. Skipping the Surface Check
Surface is the hardest pillar for both AI and humans. But the raking light test takes 10 seconds and catches defects that both the naked eye and AI miss. Skipping it is the most common reason for unexpected PSA 8 results.
5. Overgrading Your Own Cards
Collectors tend to overgrade their own cards. You want your card to be a PSA 10, so you unconsciously ignore minor defects. AI tools help here — they have no emotional attachment and assess the card objectively. Trust the AI over your gut, especially on borderline cards.
6. Not Checking Population Reports
A card that grades PSA 10 but already has 5,000 PSA 10s in the population report may not be worth the grading cost. Always check pop reports before submitting — a scarce card with low population is a better submission candidate than a common card with thousands of existing 10s.
The CCES Final Checklist
Before submitting any card to PSA, BGS, or CGC, run through this CCES (Centering, Corners, Edges, Surface) checklist:
| Pillar | Check | PSA 10 Standard | Tool |
|---|---|---|---|
| Centering | Front L/R and T/B ratio | 60/40 or better | AI Centering Tool |
| Back L/R and T/B ratio | 75/25 or better | AI Centering Tool | |
| Corners | All 4 front corners sharp? | No whitening | 10x Loupe |
| All 4 back corners sharp? | No whitening | 10x Loupe | |
| Edges | All 4 edges clean? | No chipping | Loupe + AI |
| Surface | Raking light test | No indentations | Raking Light |
| UV light test | No hidden defects | UV Light | |
| Gloss consistent? | No matte spots | Visual + AI |
If your card passes all CCES checks and the AI predicts PSA 9+ with high confidence, submit with confidence. If any check fails, reconsider — the card may still be worth submitting at a lower expected grade, but you should adjust your expected value calculation accordingly.
Ready to start pre-grading? Try PreGradeCards Complete Card Grading with 50 free credits — no credit card required.
Sources & Further Reading
- PreGradeCards — AI Grading Accuracy Benchmark Study
- Cardboard Connection — 2026 DIY Grading Guide
- CardGrade.io — Pre-Screen Your Cards Before PSA
- SnapGradeAI — Check PSA Grade Before Submission
- TCGrader — AI vs PSA Grading Accuracy
Marcus Chen has evaluated over 50,000 sports cards and TCG cards across PSA, BGS, SGC, and CGC standards. Before joining PreGradeCards, he worked as a submission specialist for a major grading company and trained collectors and dealers on condition assessment.
Create a free account and get 1 free credit — enough for 1 complete AI grading with market pricing. No credit card required.
Sign Up Free →